Real Estate Photography

How To Photograph Real Estate, Interiors, And Architecture: Where Art Meets Architecture

After over six months in production, I am happy to announce that my tutorial 'Where Art Meets Architecture: How To Photograph Real Estate, Architecture, and Interiors' is finally available! I partnered up with Fstoppers.com to create a comprehensive eight-hour tutorial which covers so many facets of architectural and interior shooting.  I wanted to give my readers and followers the first chance to purchase the tutorial, which is available for $299 (click here), before it goes open to the public, pending Fstoppers.com's migration to a new server this week.

I will explain each and every technique that I use to produce my photographs. The full photography tutorial is broken down into three chapters, each covering the tools necessary to succeed in the different niche markets within the field of interior photography. So no matter if you are an experienced photographer or have never taken your camera out of auto mode, I'll take you from shooting basic bedrooms all the way through my complicated light-painted exteriors. 

We've created a ten-minute trailer for the tutorial, which breaks down everything inside it and gives a brief look into my workflow, which can be seen here:


Here's what I cover throughout the tutorial:

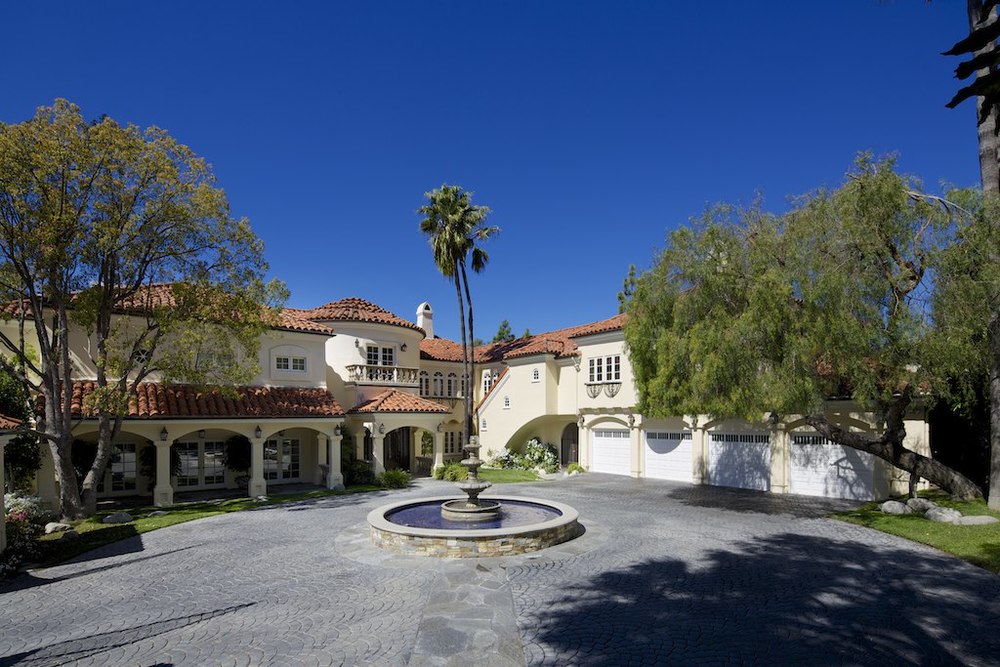
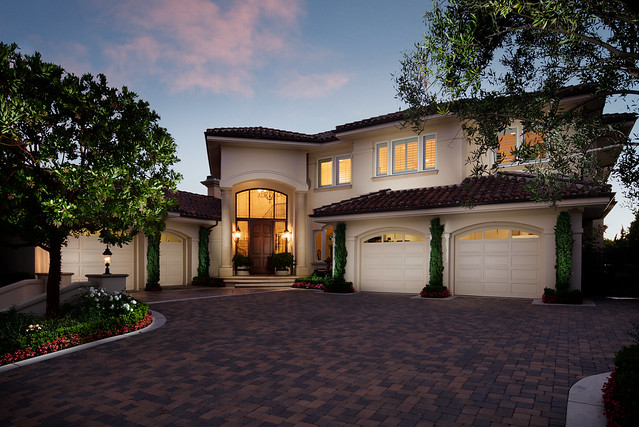
Real Estate Photography: In the Real Estate section, I take the time to teach you everything you need to know about this genre so you can kick start your career and start producing images for real estate agents, listing agents, and general property management. All of the basics will be covered in this chapter including:

  • How to get started with minimal gear
  • How to bounce flash effectively
  • Using natural light to your advantage
  • Properly composing your frame
  • Choosing the correct focal length
  • How to retain exterior window views
  • Two, three, and four light setups
  • Correcting pincushion and barrel distortion
  • Fixing converging lines in Photoshop
  • Creating a final image completely in camera

 
In addition to getting started, I'll also talk candidly about how I have found success in the real estate market, and how you too can build a money making business shooting properties for sale.

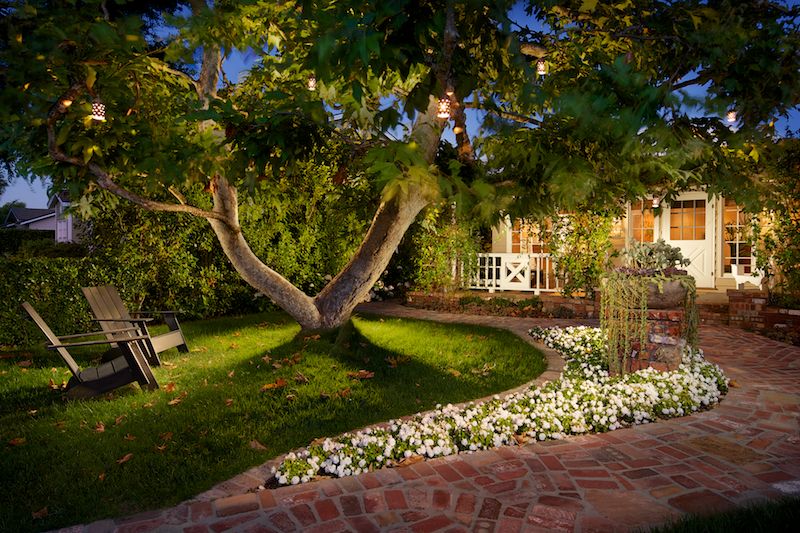
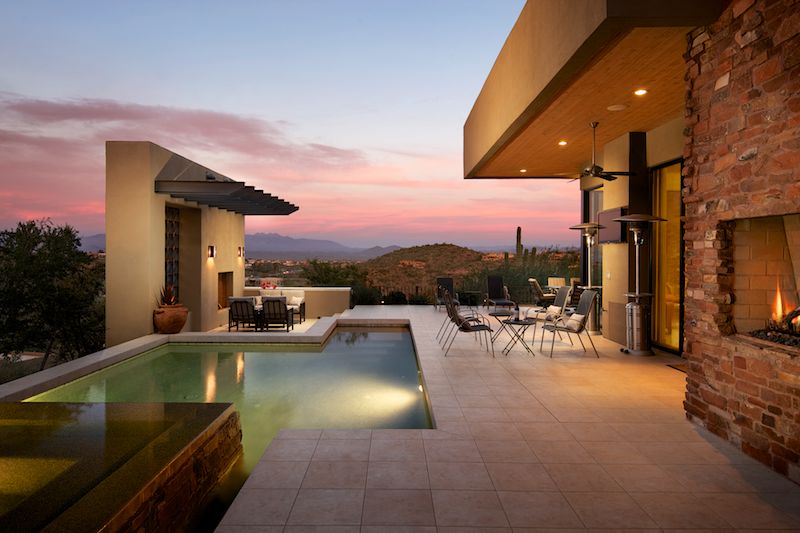
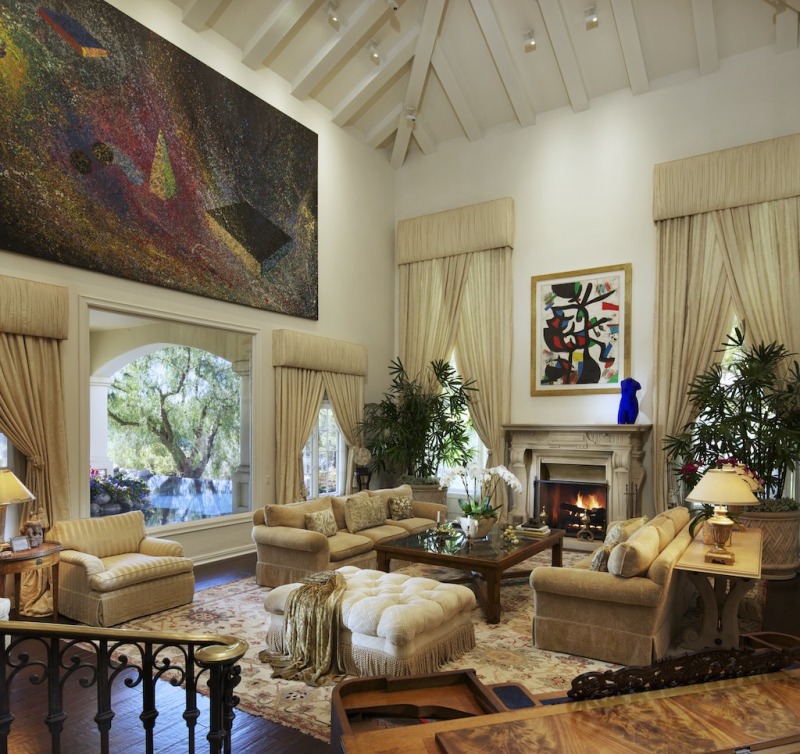
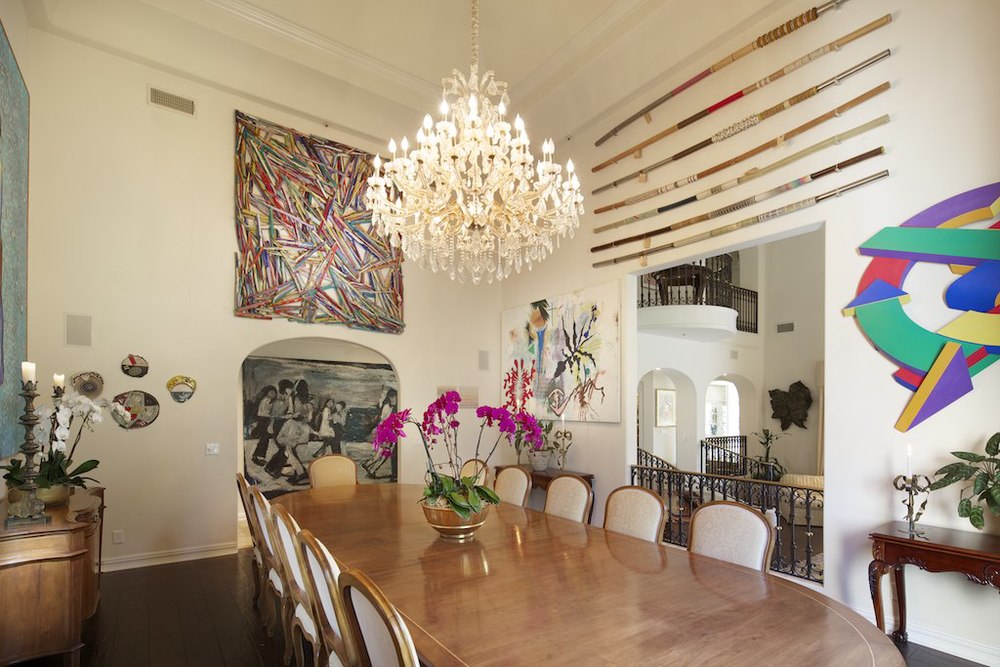
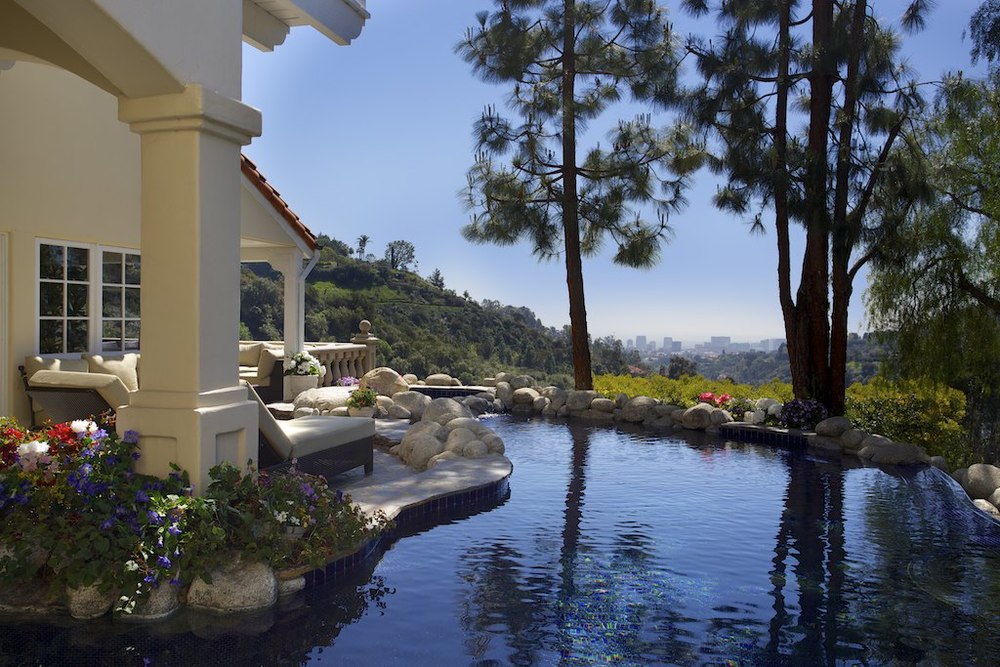
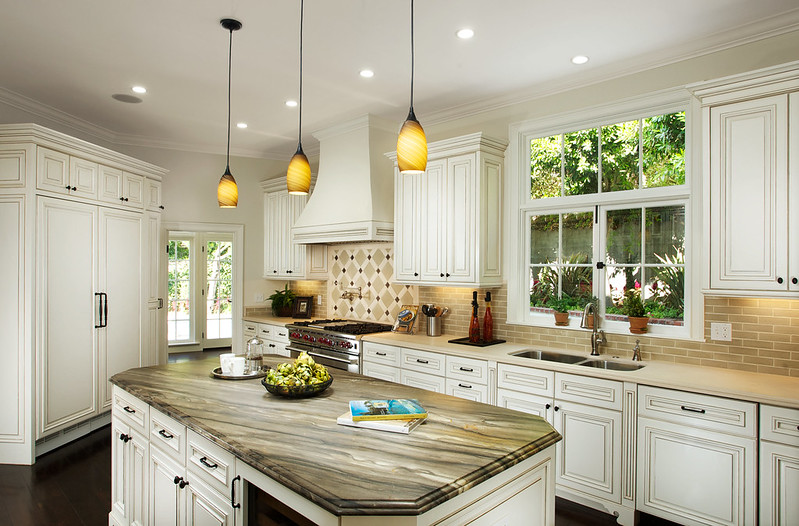
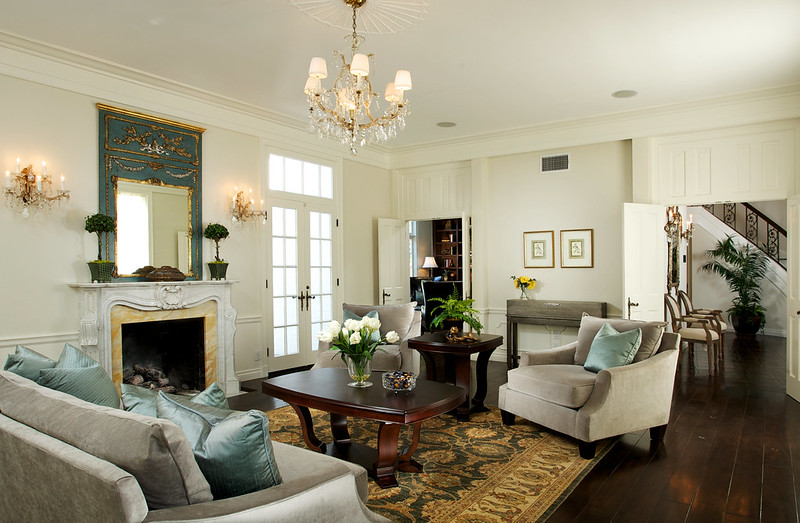
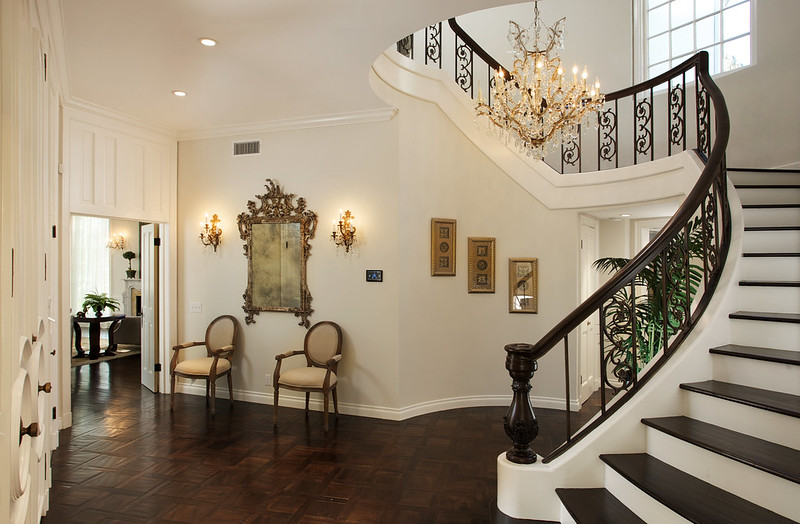
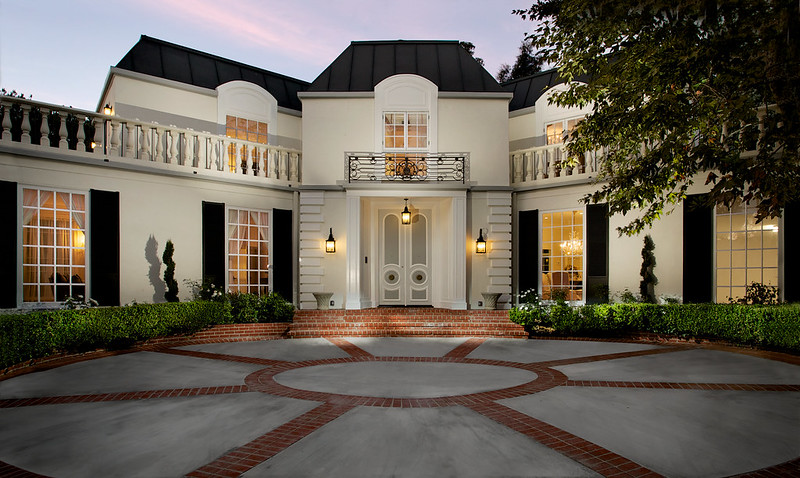
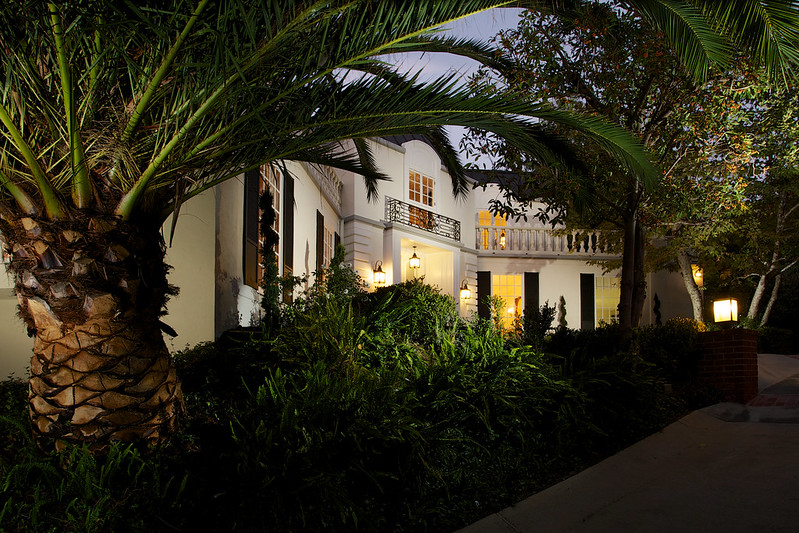
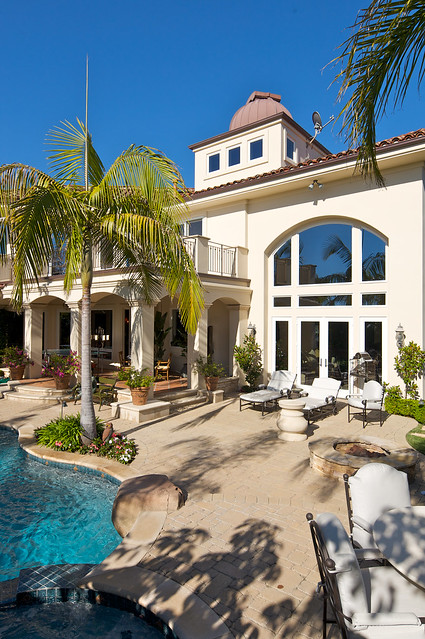
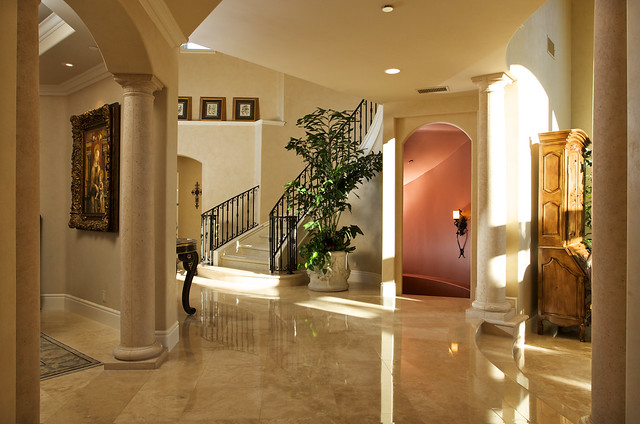
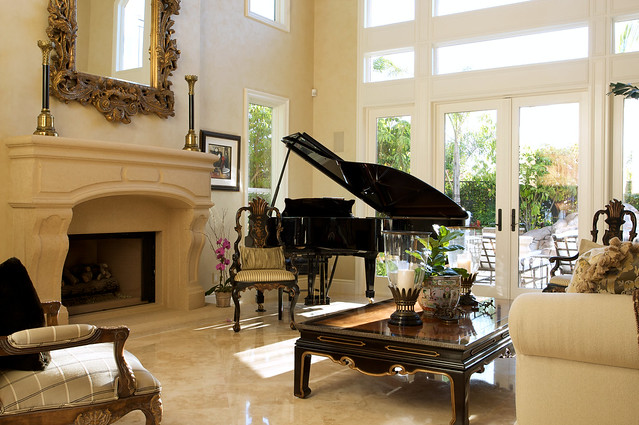
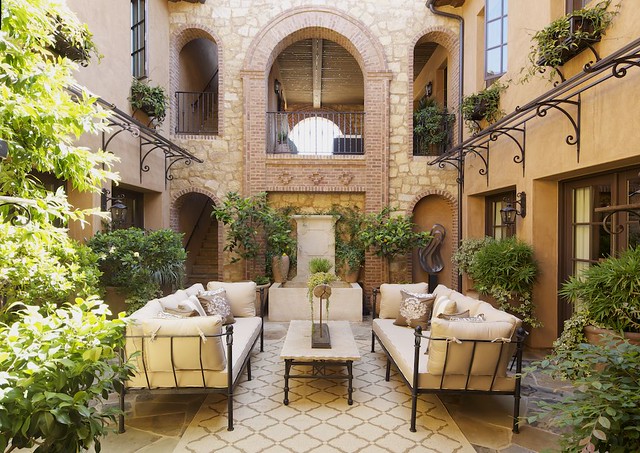
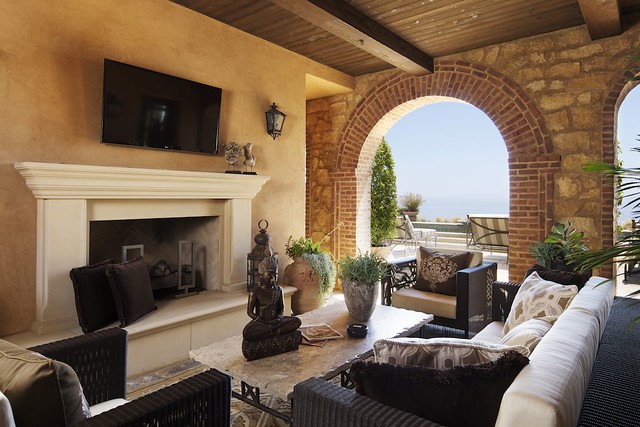
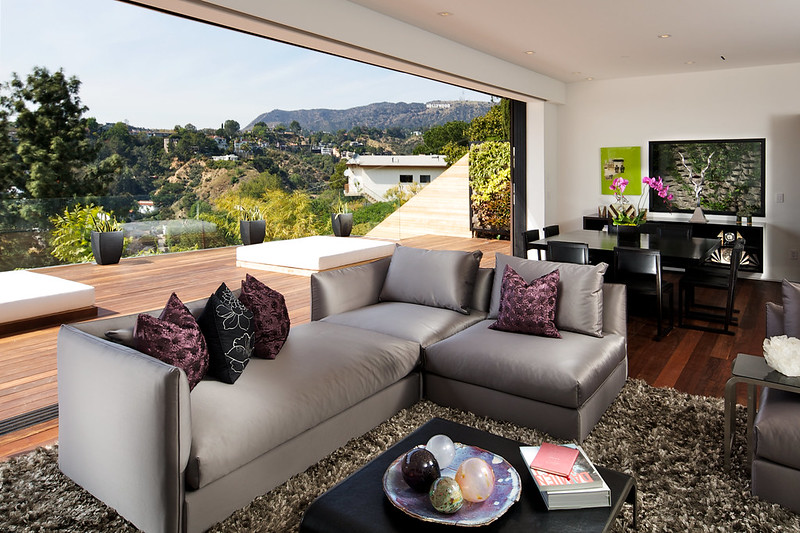
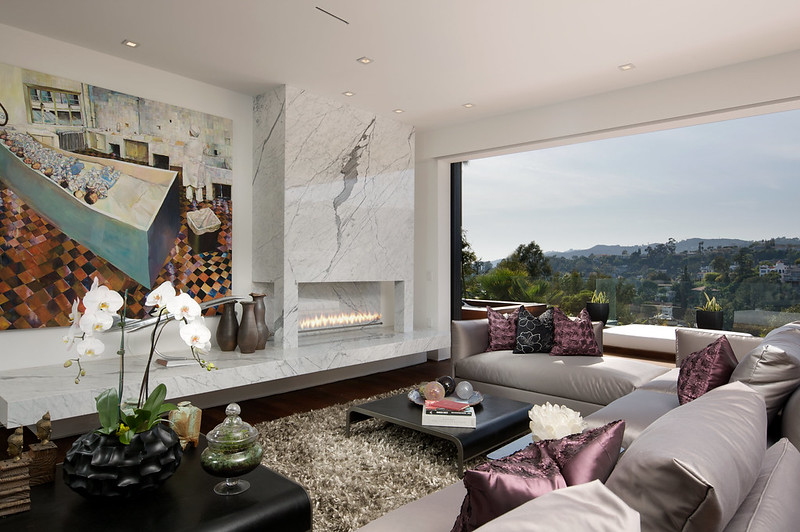
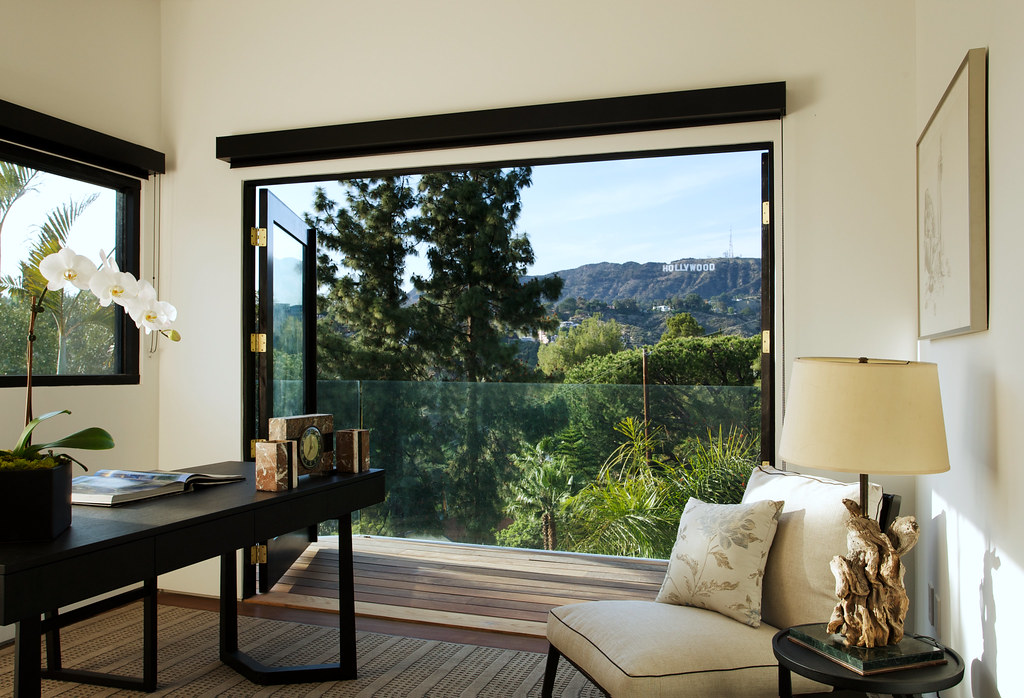
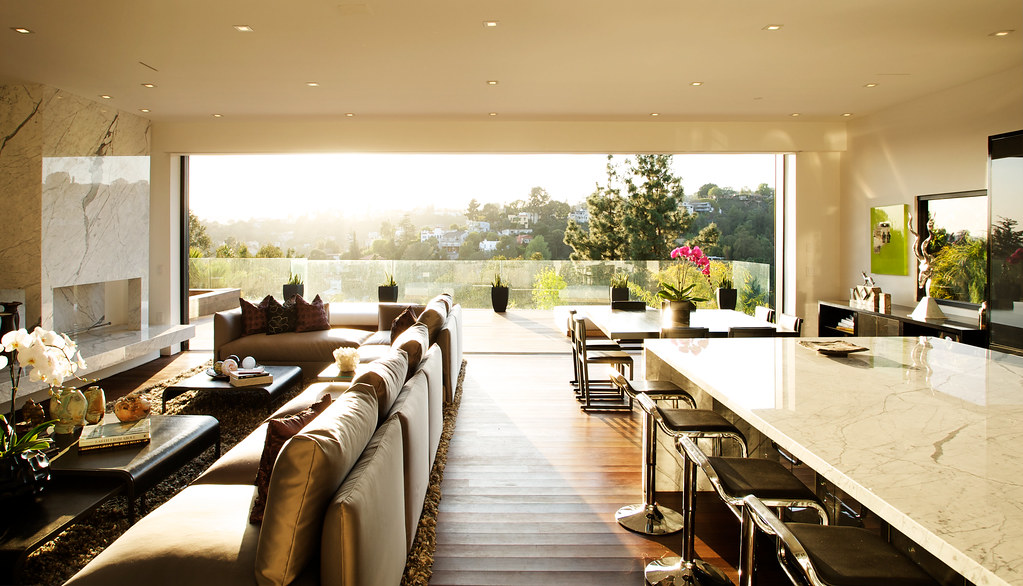
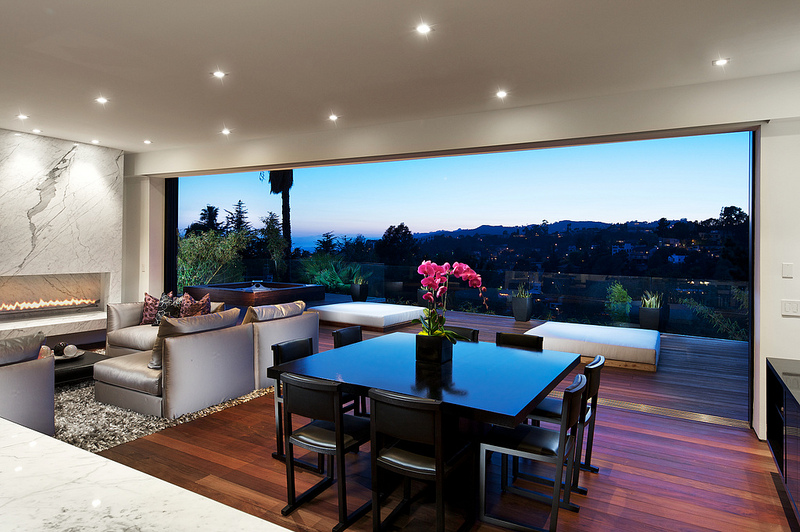
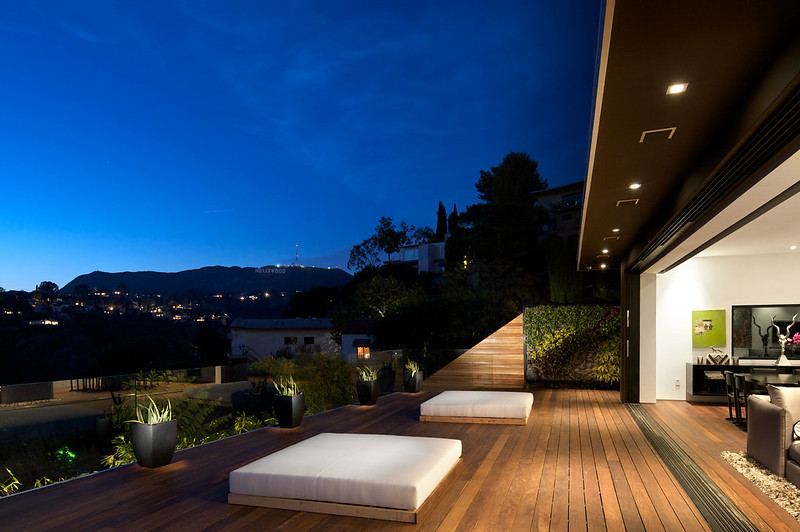
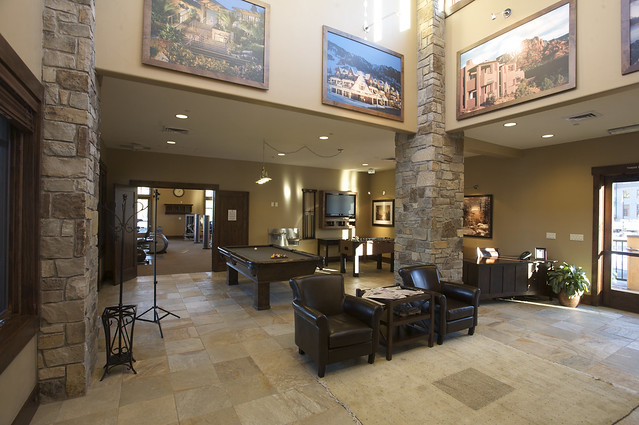
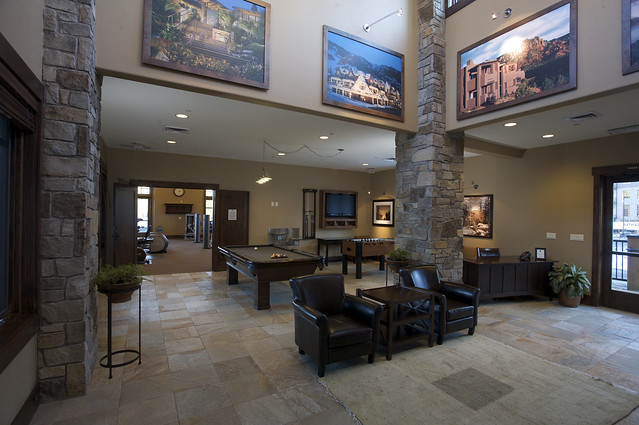
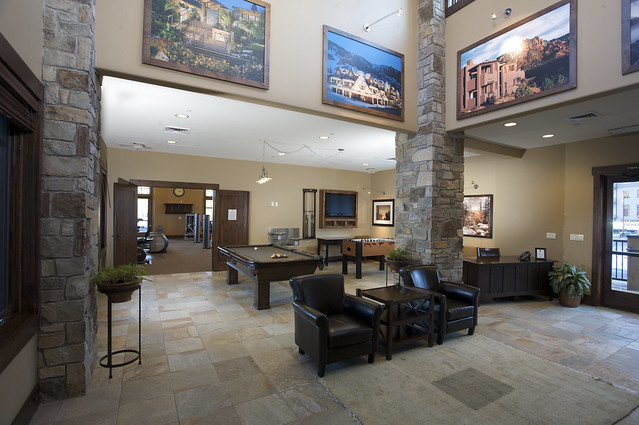
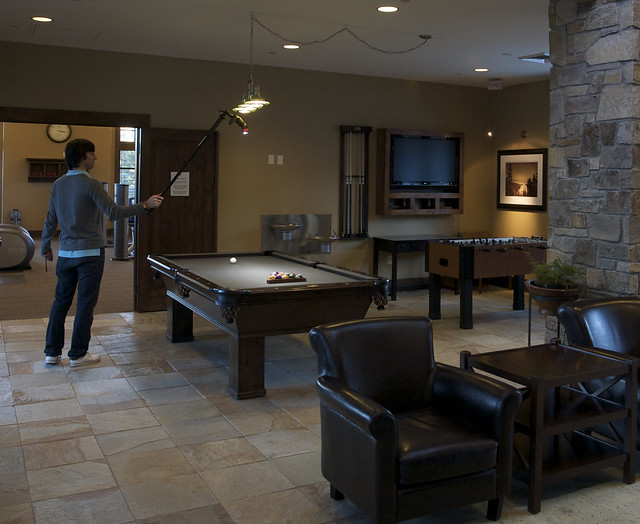
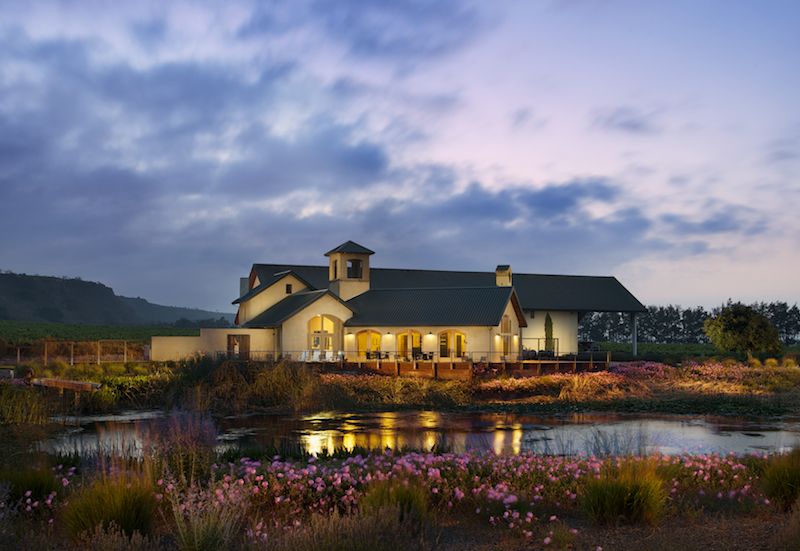
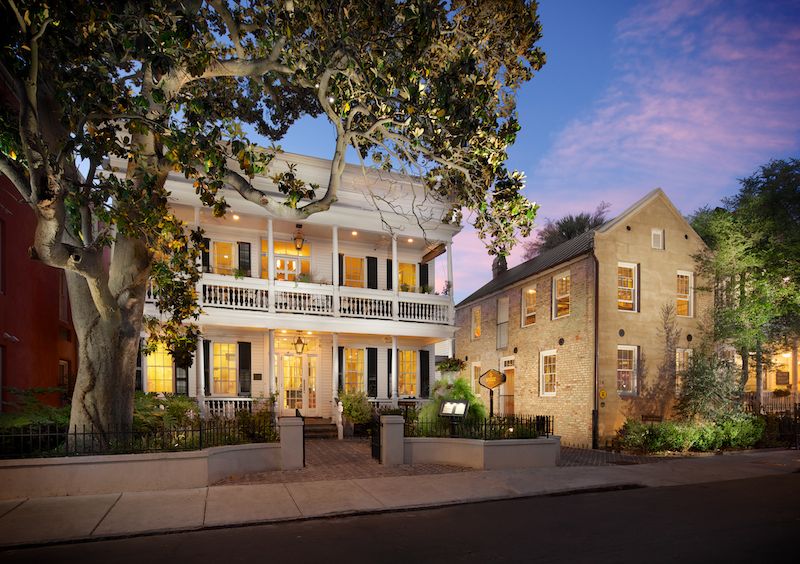
Architecture and Interior Photography: This chapter focuses on how to create photographs for higher paying clients like architects, home builders, interior designers, and magazine editorials. With the ground work already laid down, I will focus on streamlining your workflow and pushing your images into actual works of art. While on location at an actual architect’s personal home, I'll take you step-by-step through eight flagship images from initial capture all the way through the final photoshop editing process. We have also included a full Photoshop PSD file of a twilight exterior images so you can follow along as we go through photoshop.

  • Twilight Exterior Technique
  • Advanced light painting and compositing
  • Tethering to an ipad/iphone
  • Using scrims  and flags to control reflections/specular highlights
  • The “Moody Interior Twilight Shot”
  • Faking warm sunlight
  • Staging furniture for strong compositions


Commercial and Advertising Photography
: In this final section, I'll take you on the set of two commercial spaces and demonstrate how to produce perfect images for restaurants, hotels, wedding venues, resorts, and other commercial clients. Emphasis will be placed on meeting your clients needs and lighting images according to the use of the space.

  • Creating twilight images while a restaurant is open for business
  • Incorporating people into your photography
  • Lighting multi room locations
  • Replacing details in Photoshop
  • Lighting large banquet halls
  • How to create an inviting atmosphere

 
In addition, I also touch on commercial project pricing, licensing, and dealing with clients in a way that keeps everyone happy and creative energy high.

If you are interested in purchasing the DVD, you can click here, which will take you to our e-junkie store, where it is available for $299, which in my opinion is a great value. I have watched it a few times and every time I watch it I think about what a steal it is! It took me years to figure all of this out and to hone my craft to the point that its at today. Unfortunately, my partner, Fstoppers.com has been absolutely slammed with traffic from a few of our posts that went viral, which we are working on getting fixed right now, and I am releasing this to just my loyal followers until it goes public at the end of the week.

I hope you like what you see - we've gotten a handful of glowingly positive reviews from watchers, which is great to see after all of the work that went into it. If you have any questions at all, feel free to shoot me an email or reply to this post and I'll get back to you!


Stone Canyon, Bel Air Home Overlooking Wilshire Blvd

It's been a really busy few months, and I am just now finding some time to catch back up on the blog. I've been shooting all over the LA area, from Thousand Oaks to Simi Valley, Bel Air and San Pedro. The diversity of architecture across this part of the country never ceases to amaze me - you could lose yourself photographing all of the great homes in the area. 

Check out this Bel Air classic located at the top of Stone Canyon. Situated on five acres with a private golf hole/driving range, indoor/outdoor pool with an infiniti edge, and views over Wilshire Blvd. Simply incredible that I get to wake up and spend time in homes like this.


Photographing An Architecturally Significant Home In Beverly Hills Designed By Paul R. Williams

I was recently hired to photograph this architectural treasure in Beverly Hills, CA. Designed by the great Paul R. Williams, this was his last residential project before his death in 1980. Williams practiced largely in Southern California and designed the homes of numerous celebrities, including Frank Sinatra, Lucille Ball and Desi Arnaz, Lon Chaney, and Charles Correll. In addition to countless residential projects (over 2,000), he also designed and worked on many well-known public buildings in Los Angeles such as the Theme Building at LAX, The Beverly Hills Hotel, and numerous state and federal buildings in the LA area. For more reading, check out his Wikipedia page here.

Photographing High-Tech Real Estate For The Space Enthusiasts Out There

Check this one out! This home, located in Laguna Niguel, CA, was constructed around a custom-made observatory. Situated 30 feet above ground and built on concrete-filled pillars which extend 20 feet below ground for stability, this was truly a one-of-a-kind home. Need I mention the gorgeous travertine floors and incredible backyard? This was definitely one of the coolest homes I've photographed.


Luxury Interiors: Photographing An Architectural Gem In Orange County

This architectural beauty in Orange County, CA, was an absolute pleasure to shoot. The recently finished four-story home featured an open-air atrium in the center of the home that spanned the entire height of the home, and a custom pool that overlooked the Pacific Ocean with views for miles in every direction. Situated at the top of a scenic overlook, it felt so far removed from the bustling metropolis that is the greater Los Angeles and San Diego area. The space provided a wide range of challeneges - no shortage of problem solving here. High-noon light blasted into the dark wood interior, and I often had to juggle five or six different spaces in the same frame. I love this type of shooting, however - the greater the challenge, the greater the reward! 


Architectural Photography Of A Private Residence in the Hills of Los Feliz

I was recently commissioned to shoot this incredible new construction in Los Feliz, CA. This shoot presented it's own series of unique challenges, however the setting allowed for some incredibly dynamic photographs. The first challenge was dealing with the extreme brightness range of the scene - that's bright, midday sun streaming in against a white interior with a dark wood deck outside. Pretty tough to keep it all in check. The following were shot with a set of Pul C. Buff Einsteins.


One of my favorite shots from the day was a result of the sun setting directly in front of the sliding glass doors which opened to an expansive view over the hills. The sun aligned perfectly with the back of the home and filled the entire place with a surreal, golden light. Definitely one of the most intriguing shots I've taken, and the best part is that it was nothing but 100% natural light. You don't always need a truckload of gear to pull off a shot, though getting lucky like this certainly makes it easier.

 Lastly, a couple twilight images - we know how much I love these.


Mike Kelley: "Baiting With Light." mpkelley.com featured on Pocketwizard website

Off-camera lighting specialists Pocketwizard recently featured my work on their website and in their blog. The article goes into detail about how I got started in interiors and architectural photography, as well as explains some of my techniques and methods used to create my images. I think it's well worth the read, and they did a fantastic job writing both an informative and somewhat humorous article. An excerpt of the article can be read below, and the entire article can be read by clicking here.


Thanks to Ron Egatz, Dave Schmidt and everyone at Pocketwizard who has offered assistance or put up with my questions for the past few years!


Why aren't you writing thank-you notes for your architectural and real estate photography clients?

I am thoroughly convinced that I have landed my biggest job to date and kept my biggest clients by writing thank you notes. It shows that you care. It shows that you think a little bit more than other creatives in your field, and have a human side. People like this. I was asked to present a portfolio to a new client recently, and thanked them for their time with a hand-written note afterwards. They had the budget to fly someone in from Europe if they wanted to, and I know that they've worked with other photographers who's work I admire in the past. They certainly didn't pick me on price, I can assure you of that.  I was not the only option on their table. Yet, for some reason I am completely convinced that my simple hand-written thank you note was a contributing factor in me landing that job.  It costs next to nothing - I try to take a small percentage of my income and give it back to my clients - don't just mail bomb them with advertisements and phone calls asking them to use your service. Put a little time and effort in, whether it's either a thank-you note or a small gift. Doesn't need to be big. Just has to be human. I guarantee you'll see results.


The Gear I Use For My Architectural And Interiors Photography

Preface: Holy wall of text, Batman! Apologies in advance, but this had to be done.

Ever since I’ve started this blog, I’ve been getting emails asking me to detail what gear I’m using, why I’m using it, and how I’m using it. So let this be (as of 3/2/11) the penultimate gear post (I will be periodically updating it to reflect changes to my equipment, as well).  In order to make it easier to follow, I’ll break it down by category, e.g. cameras, lenses, lights, and so on.  This gear covers all of my work –  my interiors and exteriors, as well as my editorial and personal shots.

Cameras:

Canon 5d: A five year-old camera that I purchased used. My particular 5d has been dragged around the world and has the dents, scuffs and scratches to prove it. It’s incredibly slow by today’s standards, but the image quality at low ISOs is still fantastic. 13 megapixels is more than enough for my clients, who in most cases are printing, at the largest, 8.5”x11”, or using their images only on the web. I have felt the lust for the new 5d Mark II, but to be completely honest I don’t need the 21 megapixels or the increased wait times while I process photos. While the live view and video would be nice, neither are going to make my photos better.

Canon 1d Mark III: This camera is my main workhorse these days. It is a total joy to use: perfect autofocus, extremely responsive controls, and amazing image quality through ISO 1600. I also enjoy the fact that I can use this camera for everything from sports and action to interiors and exteriors. For my uses, there are no shortcomings with this camera. It covers all the bases well and I would have no problem taking this to any shoot. 10.1 megapixels is a good compromise between filesize and ease of editing.

Lenses:

Canon TS-E 17mm L: The lens responsible for 90% of both my architectural and landscape photography. I can’t speak highly enough of the image quality from this lens. Color rendition, contrast, sharpness and flare control are all exceptional. The tilt and shift functions are a necessity when it comes to correcting verticals and perspective. No more leaning buildings or trees, and by stitching I have what is effectively an 11mm lens on my full-frame 5d.

Canon 17-40mm L: My workhorse before I invested in the 17mm tilt shift. Still a good lens, but lacking in sharpness, contrast and flare control (as well as the obvious tilt and shift functions) when compared to the TS lens. Now mostly relegated to backup duty, scouting and recce use.

Canon 50mm 1.4: My interior detail and portrait lens.  Also the fastest lens I own. Works well to separate interesting features in homes, which is where it finds most of its use. Pulls double duty as my portrait lens of choice if necessary. I owned the 50mm 1.8 prior to this, and the 1.4 is quite a step up in terms of focus accuracy and build quality. I’ve long held that a 50mm prime is a must in anyone’s bag, and if you can’t spring for the 50mm 1.2 L, this is a good compromise.

Canon 15mm 2.8 Fisheye: My fun lens. Incredibly, incredibly wide, as well as sharp. Quick and accurate to focus, although most of my use with this lens requires manual focus. Currently discontinued to make way for the new 8-15mm f4 L Fisheye. To be honest, at over twice the price and one stop slower, I do not see myself upgrading to the new version.

Canon 70-200 f4 L: The baby of the 70-200 series. I’ve though about upgrading to the Image Stabilized version or the f2.8 version, but there’s just no need. The only time I use this lens is in bright sunlight and mostly for novelty use (e.g. Airshows, shooting friends, artsy things, occasionally some lit portraits). Because I don’t feel the need to upgrade, I’ve kept this lens for years. I also am not particularly wowed by the weight of the 2.8 version. I can see myself keeping this lens as long as I’m using the Canon system.

As you can see, I don’t have an enormous stable of lenses. My most used by far are the 17mm Tilt-shift and the 50mm 1.4. The rest are all extremely specialized and only see use a small fraction of the time.

Lighting gear:

Canon Speedlites: I have a smorgasbord of Canon Speedlites. They’re small, easy to transport, put out enough light for the bulk of the shooting I do, and work seamlessly with the Pocketwizard Zone Control system.

Pocketwizard Mini TT1, Flex TT5 and AC3: Together, this setup allows me to remotely control my Canon Speedlites. I can set my lights up, go back to the camera, and adjust the power of each light independently. An absolute godsend for interiors, where I’m often working with multiple lights across three rooms all at different power levels. Oftentimes my lights are tucked into crevices, perched in rafters, or clamped to whatever I can find, which makes adjusting them manually a total pain in the neck. Enter the Pocketwizard system: a dramatic time saver when multiple lights are scattered all over a scene. It’s also much easier to use than Canon’s built-in master and slave setup, which can be a total nightmare. It’s there for backup, but I would prefer never to use it. I imagine that being stuck in hell is being forced to light interiors for eternity using only Canon’s default IR triggering system.

Modifiers: I use a suite of shoot-through umbrellas, all at different sizes, as well as a large 12x12 sheet of ripstop nylon that I purchased at Michael’s. This is great for taming harsh sunlight, creating a huge surface to bounce off of, or just bouncing light around for fill. I need desperately to try out some new modifiers, as I do feel limited with only these two solutions.  Although not technically ‘modifiers,’ I have a large assortment of various stands and booms on which to mount my lights. Everything from 6’ stands to 13’ stands for reaching up into vaulted ceilings.

Misc:

Support: I use a Manfrotto 055CX3 Carbon Fiber tripod with a 488rc2 ballhead. While not the most amazing tripod setup, it gets the job done. The carbon fiber is more stable than aluminum and slightly lighter.  I’ve gotten so quick with lining up a shot with the ballhead I don’t really see the need to upgrade to a geared head at this moment. My next purchase here will be an Arca-Swiss Cube, but for the time being I am okay with the ballhead. It’s never given me an issue, and I work plenty fast with it.

LowePro Computrekker Plus AW: The bag that fits everything. 17” Macbook Pro, all the aforementioned gear, and room to spare. Plus batteries, gels, pens, paper, chargers, and filters. I’d like to purchase a foam-lined rolling Pelican case soon, however, as my back’s herniated disc doesn’t love carrying this thing.

Editing: I use an early-2009 17” Macbook Pro with Adobe CS3, Apple Aperture and a 27” external monitor. I use Gretag Macbeth hardware and software for color calibration. I could use a new computer for the heavy editing I do, but it’s not going to make my photos any better, so I will make due with this for now.

I hope this post helps to clear up some questions you might have with regards to my gear. Don't hesitate to send an email or leave a comment if you see anything you'd like to know more about.


Making Your Architectural, Real Estate, And Interior Photography Stand Out

We all spend our formative years trying to fit in; to be the same, longing to be accepted as 'normal'. Time to move on, kiddos.

Lately, I’ve seen more and more forum posts, blog entries, and rants about how hard it is to make it in photography. About how they’ll never be able to make a living because they’ve been undercut by the $30/hr hobbyist-turned-pro portrait photographer with a full-time day job with benefits, or the dreaded “Craigslist Wedding Photographer” posts.  My question is this: Why are you even competing with them? Why are you trying to do the exact same thing? I see it every day, there are hundreds of thousands, if not millions, of photographic clones out there. Now, you can take this all with a grain of salt- I could be way off the mark. I’m young (23), I didn’t own a digital camera until late 2008, and I’ve been shooting paying gigs for half of that time.  But somehow I’ve managed to make this my full-time job. The last eight months, it’s been my only source of income. And unlucky for me, my parents, while I love them dearly, aren’t paying my bills!  So it’s sink or swim, really. Has luck played a part? Absolutely. But luck only gets you so far. You need to keep juggling, keep those balls in the air, and while it may start with some luck, it doesn’t last forever on luck alone, and luck hasn’t made my client list grow exponentially from when I started.

One of the most important things I’ve learned in my short career is to know how to differentiate yourself. Somehow I managed to sail right over the heads of all the photographers in this area shooting architecture and real estate, undercutting me by 80% in some cases. I could be a sales genius, but I’ve hated every retail job I’ve held.  I have a long list of repeat clients, and a steady flow of work to keep me busy. 

So how have I differentiated myself?  (Warning: there’s some tech talk ahead!) I hope that if you don’t shoot real estate or architecture, that you can take this and learn from it regardless. It doesn’t have to be interiors or exteriors – the whole point is that you need to be different. This is how I do it – hopefully it will spark some ideas in your head.

I try to make every shot stand out. There are literally thousands of real estate photos out there, all of them bland, with no TL or C put into them by the photographer. No lighting, no editing other than a few run-of-the-mill HDRs. Every photo I take gets a seemingly impossible amount of love put into it for the volume of work I put out.   I’ve become intimately familiar with Photoshop, my cameras, my lenses, my lights. I know how everything works inside and out. While attending school at the University of Vermont, I was lucky enough to come into contact with the brains behind PocketWizard, a photographic accessories company who makes some incredibly powerful off-camera lighting tools. I interned there for the spring semester of my senior year, and they were kind enough to send me off into the real world with a few of their new products, which I have used to great effect in my photography. In particular, the Flex TT5, Mini TT1 and AC3. These dramatically cut the amount of time it takes to light an interior. Which means that I can spend less time fiddling with lights and settings, and less time making the shot happen. Take this photo as an example. Here’s the ambient frame, before any supplemental lighting, or before I cleaned it up. Just getting in, getting the lay of the land.

Next shot – I’ve cleaned up some debris here and there, and rearranged some things to tidy the space up. I’ve popped a few flashes in behind pillars and poles. They’re Canon Speedlights on PocketWizard Flexes, with a Mini TT1 and AC3 on my camera.  Two lights behind pillars, one to my right shooting into the vaulted ceiling for a tiny bit of fill.


Still pretty dark. Without even leaving the camera, I dial up the flash power on my Speedlights using the AC3.


You can see how the light from the flashes has killed the ambient coming in through the windows on the walls.  The hotspots are all gone – we have nice even lighting after bouncing it off the ceilings and walls.

And this is where the fun begins – I grab a Speedlight, throw it on my handy monopod with an umbrella swivel on the end, and start firing off some accent shots. Maybe five or six in total where I see fit – just to make the image pop and draw attention to nice aesthetic and useful/fun features of the room.

Here’s a not-so-flattering shot of yours truly giving the pool table some light. Excuse the Beatles haircut.

And finally, I put it all together in Photoshop. Thanks to the PocketWizards, the majority of the work is done. White balance is correct and the room is lit evenly (evenly enough for what was literally three minutes’ worth of work!). I make some quick layer masks of the accent frames I took, and layer them onto my flashed frame.  Here’s the finished product in all of it’s glory.


All of my shots get this treatment. Total time making this shot happen? Probably 10-12 minutes. We’ll be generous and say five minutes in the field, and five minutes in post for this one image. For an average shoot of mine, which finishes with 10-15 interior images delivered, that’s about two hours of work in the field, maybe an hour and a half finishing up and retouching the images, giving them that ‘pop’.

So, for roughly three hours worth of work, given that I stay away from Facebook, AKA ’The Freelance Productivity Killer’, what do we get? An image that jumps off the page when it’s sitting next to the typical real estate shot, which is invaluable in one of the most competitive markets ever.  More views = more sales, plain and simple. My clients appreciate this, and they keep coming back to me because of it. 

Lastly, it took me a long time to figure all of this out. I’m using this as one example of how it’s possible for you to differentiate yourself from all of the other hacks out there, and get your work noticed. It might take you a bit of time to figure out a formula that sets you apart, but once you get it, I promise that it will help you dramatically.