technique

Photographing a Modern Office Interior in Orange County: Ferm Design Concepts

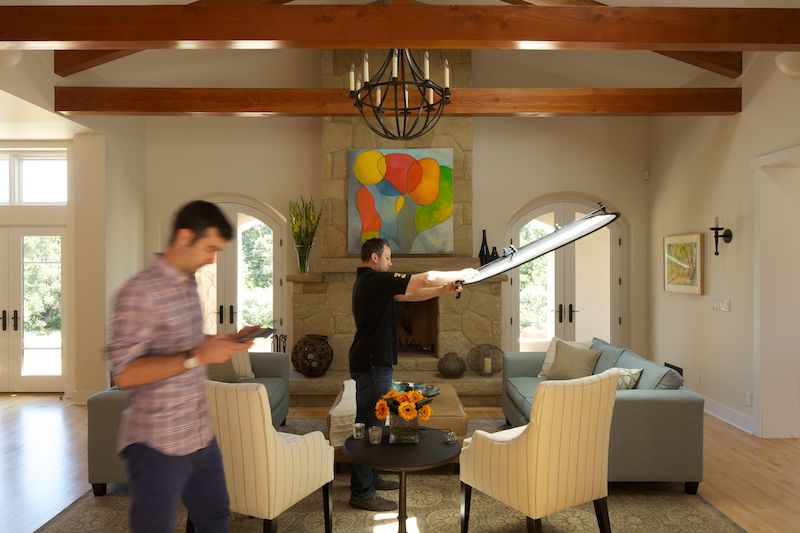
Back in October, I had the pleasure of working with one of my favorite clients, Kelly Ferm of Ferm Design Concepts and 707 Circle Lane to photograph an office interior she designed for local Orange County startup InsuranceOnline.com. Shot over the course of just a few hours - we had to be quick in order to not interfere with the day-to-day operations of the business, which was full of workers running around and getting things done! 

The waiting room, below, lit with hot and strobe light brought out the softness in the wood and smoothly curved white armchairs. By adding shadow and highlight we were able to add plenty of depth and interest in a room lit with only overhead can fluorescents for practicals. I strive to take places like this - with interesting interior design, yet fairly standard overhead office lighting - and transform them into a soft, inviting, and flattering image that presents my clients' work better than any snapshot could.


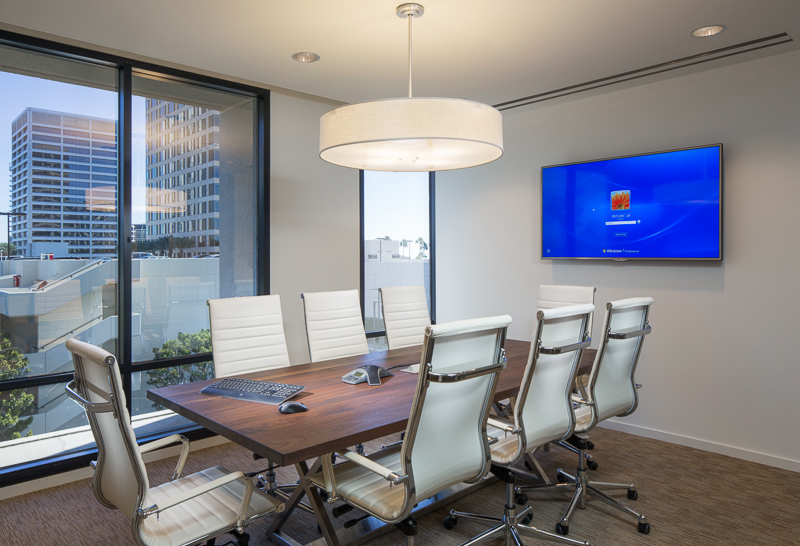
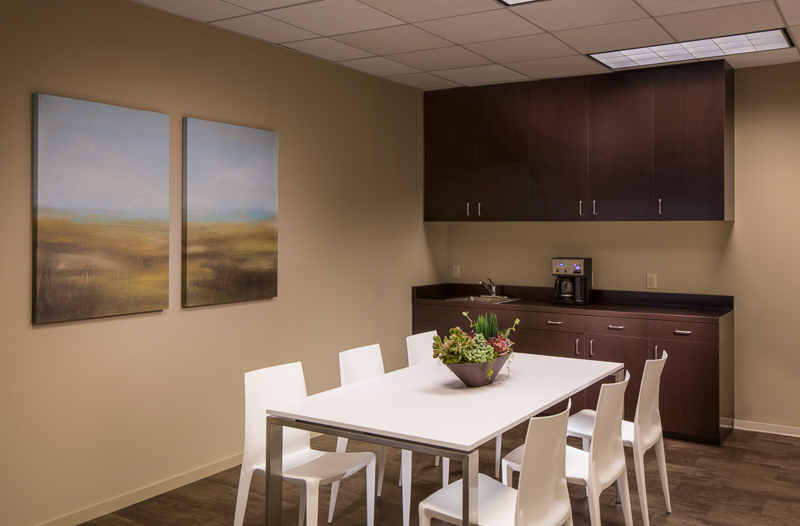
Up next, a simple conference room and break room - but bringing softness and richness to the design is a bit tricky when dealing with just ovehead fluoros. The camera doesn't quite see what the eye does, so plenty of massaging with light is necessary. Those conference room windows were heavily tinted blue, and required some serious gelling of the lights to make it all match. 

And lastly, my favorite shot from the day, and a very impromptu one at that, shot as most of the workers were at lunch. I saw this angle upon walking in and wanted to shoot it, but pulling it off would be tough. We only had about 20 minutes or so to clean, organize, stage, and light the space, which of course was tricky. Working with an assistant, we hid everything we could, arrange the desks and computers as best as possible, had a few workers stand in for models to give some life and activity, threw a couple lights up, mostly in a seat-of-the-pants fashion, and let it ride. What resulted is one of my favorite shots in recent memory. Even a simple office interior can photograph incredibly well if the architecture lends itself to it. 


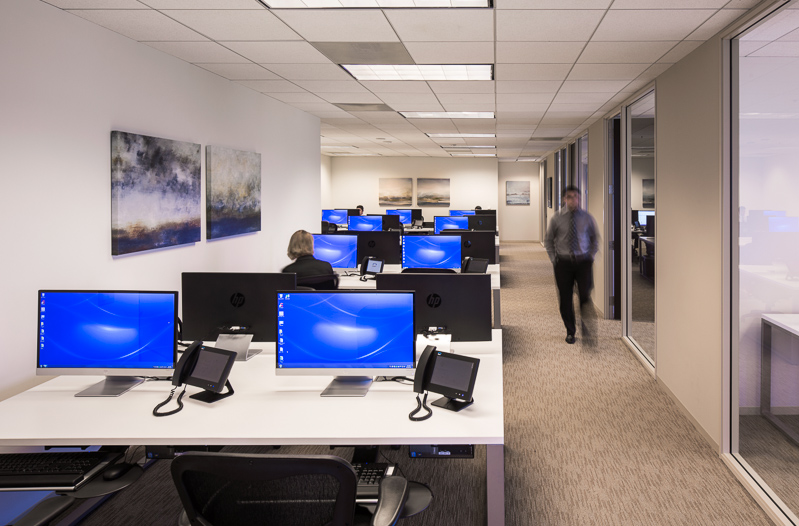
And this shot, as it turns out, lent itself to a very nice black and white conversion, which I find quite reminiscent of a few shots of Julius Shulman's. A classic, contrasty one point perspective which draws the eye in and lets you linger. Thanks, Kelly, for the great subject and chance to make some killer photos!


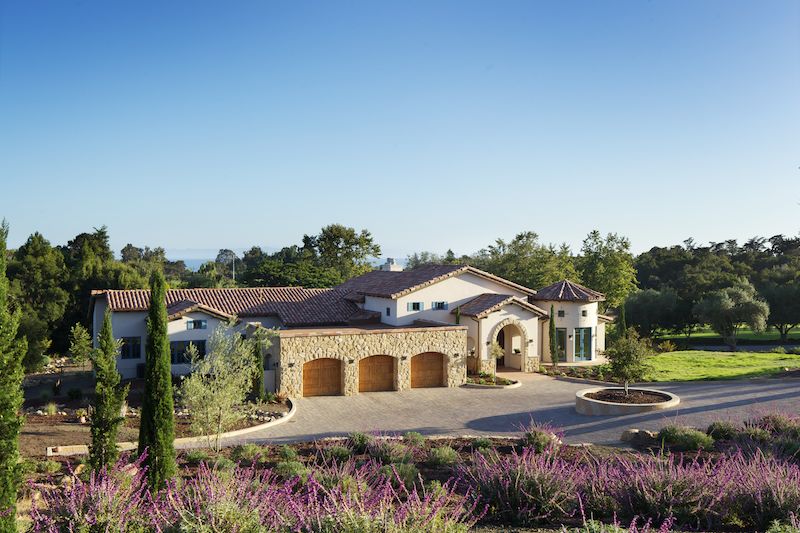
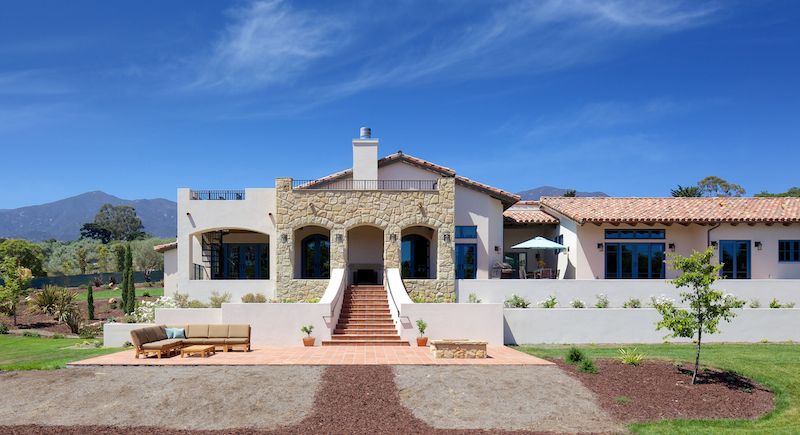
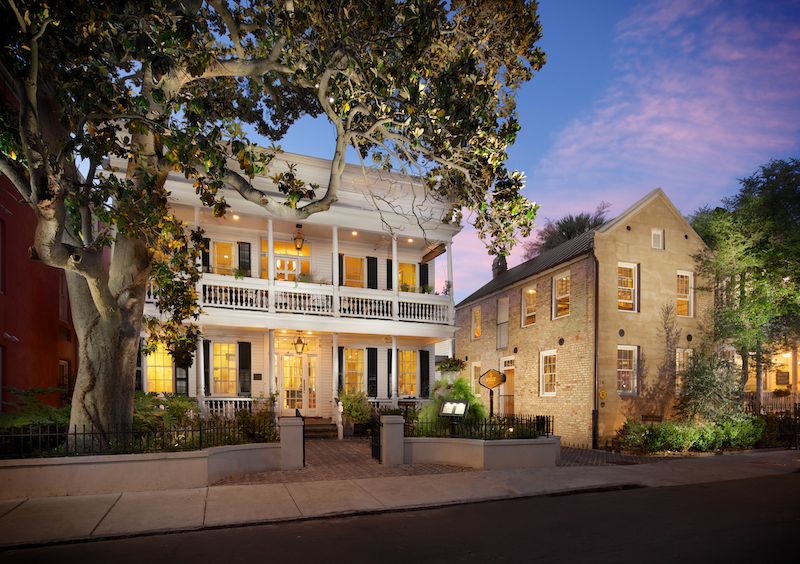
You'll have to excuse my lack of blogging lately, as I have been busier than ever and all over the west coast photographing (nearly 4,000 miles driven in the last two months alone) a number of different projects. Expect a lot more posts as this cools down and the holidays come up.


How To Photograph Real Estate, Interiors, And Architecture: Where Art Meets Architecture

After over six months in production, I am happy to announce that my tutorial 'Where Art Meets Architecture: How To Photograph Real Estate, Architecture, and Interiors' is finally available! I partnered up with Fstoppers.com to create a comprehensive eight-hour tutorial which covers so many facets of architectural and interior shooting.  I wanted to give my readers and followers the first chance to purchase the tutorial, which is available for $299 (click here), before it goes open to the public, pending Fstoppers.com's migration to a new server this week.

I will explain each and every technique that I use to produce my photographs. The full photography tutorial is broken down into three chapters, each covering the tools necessary to succeed in the different niche markets within the field of interior photography. So no matter if you are an experienced photographer or have never taken your camera out of auto mode, I'll take you from shooting basic bedrooms all the way through my complicated light-painted exteriors. 

We've created a ten-minute trailer for the tutorial, which breaks down everything inside it and gives a brief look into my workflow, which can be seen here:


Here's what I cover throughout the tutorial:

Real Estate Photography: In the Real Estate section, I take the time to teach you everything you need to know about this genre so you can kick start your career and start producing images for real estate agents, listing agents, and general property management. All of the basics will be covered in this chapter including:

  • How to get started with minimal gear
  • How to bounce flash effectively
  • Using natural light to your advantage
  • Properly composing your frame
  • Choosing the correct focal length
  • How to retain exterior window views
  • Two, three, and four light setups
  • Correcting pincushion and barrel distortion
  • Fixing converging lines in Photoshop
  • Creating a final image completely in camera

 
In addition to getting started, I'll also talk candidly about how I have found success in the real estate market, and how you too can build a money making business shooting properties for sale.

Architecture and Interior Photography: This chapter focuses on how to create photographs for higher paying clients like architects, home builders, interior designers, and magazine editorials. With the ground work already laid down, I will focus on streamlining your workflow and pushing your images into actual works of art. While on location at an actual architect’s personal home, I'll take you step-by-step through eight flagship images from initial capture all the way through the final photoshop editing process. We have also included a full Photoshop PSD file of a twilight exterior images so you can follow along as we go through photoshop.

  • Twilight Exterior Technique
  • Advanced light painting and compositing
  • Tethering to an ipad/iphone
  • Using scrims  and flags to control reflections/specular highlights
  • The “Moody Interior Twilight Shot”
  • Faking warm sunlight
  • Staging furniture for strong compositions


Commercial and Advertising Photography
: In this final section, I'll take you on the set of two commercial spaces and demonstrate how to produce perfect images for restaurants, hotels, wedding venues, resorts, and other commercial clients. Emphasis will be placed on meeting your clients needs and lighting images according to the use of the space.

  • Creating twilight images while a restaurant is open for business
  • Incorporating people into your photography
  • Lighting multi room locations
  • Replacing details in Photoshop
  • Lighting large banquet halls
  • How to create an inviting atmosphere

 
In addition, I also touch on commercial project pricing, licensing, and dealing with clients in a way that keeps everyone happy and creative energy high.

If you are interested in purchasing the DVD, you can click here, which will take you to our e-junkie store, where it is available for $299, which in my opinion is a great value. I have watched it a few times and every time I watch it I think about what a steal it is! It took me years to figure all of this out and to hone my craft to the point that its at today. Unfortunately, my partner, Fstoppers.com has been absolutely slammed with traffic from a few of our posts that went viral, which we are working on getting fixed right now, and I am releasing this to just my loyal followers until it goes public at the end of the week.

I hope you like what you see - we've gotten a handful of glowingly positive reviews from watchers, which is great to see after all of the work that went into it. If you have any questions at all, feel free to shoot me an email or reply to this post and I'll get back to you!


Architectural Photography: Light Painting A Winery From a Half-Mile Away

I once again loaded up the car and headed away from Los Angeles to the Salinas Valley to photograph the Hahn and Wrath Wineries, both of which are located around an hour from Carmel in an amazing setting. Shooting these wineries presented a number of challenges, and I'm going to talk a little bit about how I overcame them. I know I've been on a bit of a hiatus lately, but hopefully this post makes up for it. 

First, let's talk about the shoot I did for Hahn Wineries in Soledad, CA. The client had a few ideas for shots that they knew they wanted, and they more or less left the rest up to me. I was given a tour of the grounds, and immediately settled on a few shots, and scratched my head over a few more. They had mentioned that they wanted a few great shots of their tasting room, which is one of their big attractions for visiting customers. The problem was that the tasting room is elevated about 20 feet off the ground on a steeply sloped hillside, and was entirely surrounded by trees on the high side. Any hopes of me creating an architecturally interesting photograph from the ground were quickly dashed, and my options seemed to be severely limited to either renting a helicopter (expensive) or using some extremely tall and unstable pole to shoot from the slanted ground below (a bad idea, and generally unsafe). 

While walking around and talking to the client, they pointed out a ridgeline on the other side of the valley where they often took customers on the tour to see the entire layout of the winery and its vineyards. I was initially reluctant to try to shoot from this vantage point, as the small size of the tasting room would require some serious telephoto reach and would eliminate nearly all of the architectural appeal of the building. On a whim, I asked if we could take a ride up to the ridgeline to see if we could gather any other shots, and it turned out to be a pretty great vantage point from which to shoot the tasting room. 

While I didn't end up zooming in that far (we ended up shooting at 50mm) the shot actually looked like it might work. While you lose some of the architectural details of the tasting room, you do get an incredible view of the grounds and the sense of scale becomes immediately evident. I made a decision to make the twilight shot more about the entire winery rather than just the tasting room, which I will admit was a little daring on my behalf. 

After choosing where to take the photo from, it was just a matter of playing the waiting game until sunset. Once dark enough, I had my assistant Jaron  head back to the tasting room armed with a big light and a walkie talkie.

Because of the distance involved and the fact that I was standing on the side of a valley, we weren't able to use PocketWizards to light the scene as I usually would. This was simply too far, and I didn't want to try to wrangle multiple PocketWizards in relay mode from my position, down to the valley floor, up the other side of the valley, and again to the tasting room. Too much time and effort for something that franky just didn't seem like it would work. So we tried another untested method - I would talk to Jaron on the walkie talkie, count backwards from three, and open the shutter for a long exposure. He would (ideally) then pop the flash manually while the shutter was open for the 3 or so seconds I'd set it to, and the sensor would record the flash pop. Here's one of the frames that was composited so you can see what I'm talking about:

I'm happy to say that we were somewhat succesful. For this exterior view, we delivered two shots - one with light trails, and one without. I wanted to give a sense that you might be able to take a sunset winery tour in the ATVs provided by the facility, and even though the client didn't request it, I thought it was a cool add-on with minimal work involved, so I threw it in anyway.


So, all that effort - do you think it was worth it? It's certainly a unique shot, the likes of which I don't have in my portfolio and it was something I don't think I'll be trying often. Another challenge for me was dealing with the fog that rolls into the valley and the haze that forms as a result. I'm not sure if it gives this photo a bit of mood and a sense of place, or if it just distracts. 

Below are a few more images from the job - my personal favorite is the image of the tasting room, shot with a Lowel GL-1 hotlight in complete darkness. 


Architectural Photography in Santa Barbara, CA: Private Residence by VFS Architecture

One of my favorite parts of California is Santa Barbara County, so it is always exciting to get sent on an assignment to shoot a project there. VFS Architects of New York contacted me to shoot a recently completed project for them in Santa Barbara, and I jumped at the chance. Santa Barbara is the definition of 'easy livin' - and it's not hard to see why. This gorgeous home was situated on top of a hill with views over the Pacific and Channel Islands, tucked away above the marine layer. 

The assignment was relatively simple, in the grand scheme of things, but required a bit of restraint due to client requests. A natural light look was desired, to make the home appear as relaxed and open as possible. While natural light sounds simple enough, there's often a large amount of shaping and refining that light to get it looking as good as it can for the camera. With the twilight shot (above) there was still a considerable amount of exterior lighting at play, from both hot light and strobe, in order to retain detail throughout. Even when applied very lightly, some supplemental lighting can go a long, long way to retain a natural feel and add depth and dimension to architecture.

So, even with the requested 'natural light' look, it still took us a full day to produce 8 images. We played quite a bit of a waiting game with the sun, waiting for it to get to just the right spot, and there was (as you can see) some whack-a-mole with the scrims going on to control and soften some of the highlights.


As a side note, while I do love putting together my twilight exterior images, I have to say that I've got quite a soft spot for showing architecture in late afternoon golden light, as seen below. There is just so much depth and texture that can be brought out when the sun is low on the horizon, bathing everything in a warm light. So much can be done to make an image warm, inviting, and dimensional just by waiting for the right light.

I think that this image (below) is my favorite from the shoot. It shows all of the home's significant architecture, the location, the feel, and the expanse of the property, something which is usually at a premium around Los Angeles and Southern California in general.

Lastly, a rear elevation shot at about 12' showing the architectural details of the back of the home:

Which is quite a semi-symmetrical feast for the eyes!


Upcoming Architectural Photography Tutorial DVD And Workshops With Fstoppers.com

Over the past few months, I've been scheming with Lee Morris and Patrick Hall of fstoppers.com to bring our combined talents together and produce a DVD/tutorial series on the subject of architectural photography. So in May and June of this year, I once again left Los Angeles and headed to Charleston, SC to begin production on the largest project I've been involved in to date. Working with local advertising agencies, we set up a series of shoots for varying clients all over the Charleston area and we were lucky enough to get them to allow us to film everything that went on. 

This is, for the most part, an entirely comprehensive tutorial. While it would be pretty impossible to teach EVERY single method of architectural photography, we did our best to cover the basics all the way through the more advanced techniques. We've got a chapter on shooting real estate and getting things right in the camera, for those who are just starting out with minimal gear. We've got a chapter shooting a home for one of Charleston's most well-known architects, where we dive into topics such as using natural light, staging a room, using scrims and subtractive lighting, light painting, and photoshop techniques to bring it all together. We've got a chapter dealing with commercial photography for restaurant interiors, as well as creating moody light painted scenes and controlling light from multiple sources to ensure that you can create a repeatable result in pretty much any situation that could ever arise. We got to shoot at some of Charleston's (and the country's) best restaurants - such as Husk, which has been voted the best new restaurant in America and has featured on many TV segments in the past few years. Very, very exciting stuff! 

Each image in the tutorial was designed to teach a technique, so keep that in mind while viewing. We wanted to show you a myriad of options for creating your own awesome architectural images, so we really pulled out all the stops and went to down wherever possible. Even if we didn't need to do it for a certain image, we included the technique anyway, just to give you as many options as possible for soliving problems that you'll face on any given architectural or interior shoot.

And here's the most exciting part of all of this. We've decided to release one of the shots - a dusk light painted exterior - with the DVD. That means you'll get the PSD files and you'll be able to follow right along as I edit the file in the tutorial. You'll be able to create an image exactly as I am, folllowing my every move - learning my techniques exactly in the method that I use them. No stone will be left unturned, as I wanted this to be an entirely comprehensive tutorial. 


Above, I've included a few of the images that we're going to walk you through step-by-step. All told, we shot over 20 images and it looks like at least fifteen of them are going to make it into the final cut. Each of them teaches a different technique - from light painting, to dealing with tricky color casts, to adding artificial light through windows, fixing pesky window views and ensuring that you can see whatever you want to see out a window, balancing light at different times of day, and so on and so forth. I'm really, really excited about this project, and I can't wait to see it released. 

As of right now, we're planning for a fall 2013 release; definitely before the new year. Keep your eyes peeled for more details, which I'll release as we get closer to completion. We've also got a number of promotional videos in the works that I'll post and share, as well!

More to come...looking forward to it all!